
Why?
You probably want to compile the Linux kernel yourself. There are several reasons, including:
- Better performance* (* = depends on configuration and hardware)
- More options/flexibility
- More control over your system
- Newer kernel version
Whatever your reason, here’s a guide on how to compile the Linux kernel!
Prerequisites & Preparation
First of all, you need to prepare your system and YOURSELF.
For your system, you simply need to install essential libraries and programs. Their exact names vary depending on the distribution you’re compiling on. For you, take a deep breath, a little patience (especially with weak hardware), and a bit more time than you think you need. By the way, this tutorial applies mostly to Debian (testing); everything else has a bit more of an gamble, to me. ;-)
# Debian and distributions based on it (e.g. Ubuntu and Linux Mint)
sudo apt-get install bc binutils bison dwarves flex gcc git gnupg2 gzip libelf-dev libncurses5-dev libssl-dev make openssl pahole perl-base rsync tar xz-utils
If you’re on a different Linux distribution, such as Fedora, which has a different package manager, the same programs will likely have slightly different names. In this case, read the guide on how to compile the Linux kernel from IT’SFOSS, which is linked in the sources!
My setup:
Distro: Debian Testing (amd64), btw :-) & Kernel 6.14.3 (Compiling)
PC:
- CPU: AMD Ryzen 9 5950x
- MoB: MSI X570 MEG UNIFY
- GPU: Nvidia RTX 3070Ti
- RAM: Kingston Fury 64GB RAM
- SSD: Samsung NVME 970 EVO Plus 1TB
- PSU: EVGA 750GQ (750W Modular)
- 2 Monitors
By the way, you don’t need powerful hardware, but compiling times are faster on more powerful hardware! ;-)
Download, decompress, extract, and verify authenticity
To compile the Linux kernel, you need its source code (btw, this applies to everything you want to compile). You can get the source code from the kernel.org website. ;-)
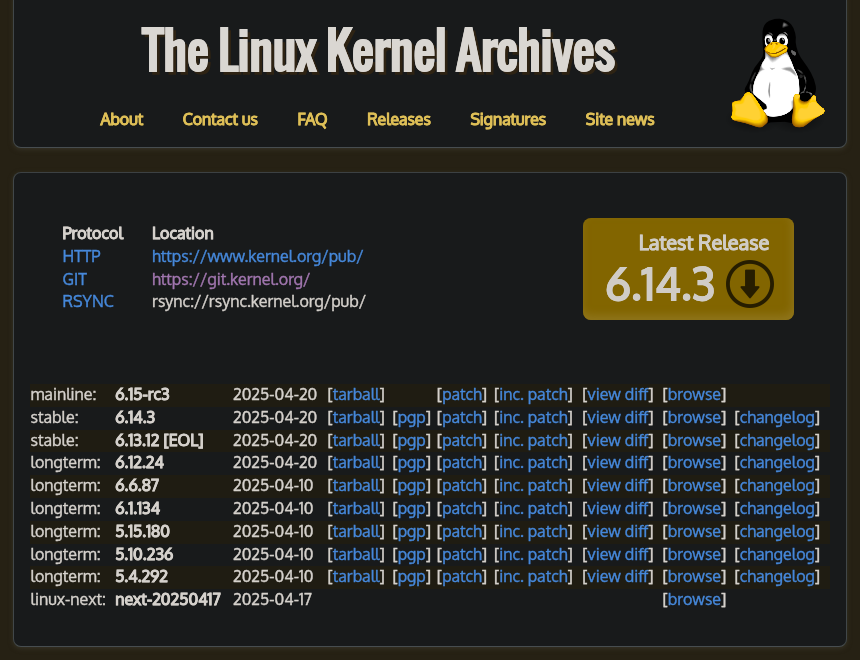
You can simply download the Latest Mainline Kernel, which is always in the big Yellow Button!
Because I use Debian Testing and have compiled around 60+ Linux kernels so far, I’ve naturally gained some experience: A note from me before 6.14.x was released!
In my case, I downloaded the latest long-term kernel (6.12.19, in my case) because the Nvidia drivers currently available from Debian’s repositories (Stable & Testing) don’t want to cooperate with 6.13.x! In most cases, you can simply use the Latest Mainline Kernel (the one in the big yellow button!) unless you know it won’t work with your current software configuration!
Next you need to decompress the kernel (with XZ).
unxz linux-*.tar.xz
After that, it’s good to check the authenticity of a kernel, but to verify it you still need the signature of your kernel.
wget https://cdn.kernel.org/pub/linux/kernel/v6.x/linux-6.14.3.tar.sign
BTW, you’ll need to adjust the link to your kernel version! After that, you can proceed with the verification. (BTW, you may need to install gpg2 or gpg!)
gpg2 --locate-keys [email protected] [email protected]
gpg2 --verify linux-*.tar.sign
If you see this message, then the signature is good. (Even if this warning appears below it! Most importantly, it says Good signature above WARNING:!)
jakub@Zuhause:~/Downloads$ gpg2 --verify linux-*.tar.sign
gpg: assuming signed data in 'linux-6.14.3.tar'
gpg: Signature made Sun Apr 20 10:24:30 2025 CEST
gpg:                using RSA key 647F28654894E3BD457199BE38DBBDC86092693E
gpg: Good signature from "Greg Kroah-Hartman <[email protected]>" [unknown]
gpg: WARNING: This key is not certified with a trusted signature!
gpg:          There is no indication that the signature belongs to the owner.
Primary key fingerprint: 647F 2865 4894 E3BD 4571  99BE 38DB BDC8 6092 693E
Now you have to extract your kernel.
tar -xf linux-*.tar
The last thing you need to do for this step is to go to your kernel folder.
cd linux-*/
Optimizing the Linux Kernel (for your system)
The .config file is the configuration file for your Linux kernel, where things like which drivers the kernel should have, which ones should only be specified as modules, and which ones should not be specified at all.
sudo cp /boot/config-"$(uname -r)" .config
So that you can now optimize your kernel, you can use these commands to either update the .config you just copied or simply create a completely new one.
# Updates the old configuration file
make olddefconfig

# Create a new .config with default settings
make defconfig
Disable module signature (For Debian & Ubuntu based distributions)**
./scripts/config --file .config --disable MODULE_SIG
It used to be like this: (pre ~6.5.x)
./scripts/config --disable SYSTEM_TRUSTED_KEYS
./scripts/config --disable SYSTEM_REVOCATION_KEYS
Kernel configuration menu
make menuconfig
Also, if you want to see (more detailed) videos about configuring and optimizing the Linux kernel, here are three good videos, in English, of course ;-)
Mental Outlaws Tutorial Denshis Tutorial DJ Wares Tutorial
Kernel (Um)benennen. Damit sich Kernels nicht in Konflikt kommen
./scripts/config --file .config --set-str LOCALVERSION "-Jakub"
By the way, you’re welcome to just use your name/username; your imagination is the limit here, basically. “-MrBean”
Compiling
make -j$(nproc) 2>&1 | tee log
-j = how many compilation jobs can run simultaneously.
$(nproc) = Specifies how many jobs are available.
-j$(nproc) means: use as many CPU threads as I have.
tee log = Creates a log file
DTBs (Device Tree Binaries)
Only for ARM & RISC-V, so you can skip this section on x86-64 computers!
If you’re on a computer with an ARM or RISC-V architecture, read the section in the IT’SFOSS guide.
(Not included in the video!)
Further compiling
make bzImage
sudo make modules_install -j$(nproc)
sudo make headers_install
DKMS (Nvidia & ZFS Users!)
“Dynamic Kernel Modules,” as the name suggests, are “dynamic” kernel modules that can be integrated outside of the kernel. The most well-known application for DKMS is Nvidia drivers. If you have an Nvidia graphics card and have installed its drivers, and don’t build DKMS, your kernel won’t work!
sudo dkms autoinstall -k #VERSION-NAME
In practical use it would look something like this.
sudo dkms autoinstall -k 6.14.3-Jakub
For more info, read the DKMS Archwiki article!
sudo make install
Now, you can reboot into your new kernel. ;-)
Uninstall
If you want to remove your self-compiled kernel, use the following commands.
!!!! Don’t forget to replace <kernel_version> with your actual kernel version.
Removes kernel modules
sudo rm -rf /lib/modules/<kernel_version>
(Removes device-tree binaries)
sudo rm -rf /boot/dtb-<kernel_version>
Removes the Linux kernel and generates a new GRUB configuration without the just removed kernel.
sudo rm -vf /boot/{config,System.map,initrd.img,vmlinuz}-<kernel_version>

sudo update-grub # or sudo grub-mkconfig -o /boot/grub/grub.cfg
Sources
-
It’s Foss Guide: How to compile the Linux Kernel (Kernel 6.5.5)
-
My own experience ;-)